October 14, 2016
Live Booting (USB)
Live Booting an Operating System from an USB
FAQ:
What is live booting?
Live booting is running an operating system on the computer's memory rather than its hard disk drive.Does live booting remove my previous operating system?
No. If you don't want to install the operating system you don't have to.What is the BIOS?
Basic Input/Output System. You'll need to access the BIOS if you want to live boot. Usually done by pressing F12/F11 when starting the computer/laptop.What is a ISO file?
It is a file that acts like a physical CD.Requirements for Live Booting
1 Laptop / Computer 1 USB 1 ISO File with the operating system Rufus (only WINDOWS)
General Steps
For Linux:
For Windows:
Specific Guide
For Linux:
Step 1: Download ISO
The ISO can be either 64 bit or 32 bit. Normally it should match the current bit you own. A quick way to check which bit your computer has is by doing the following ...
$ uname -a Note:
uname is used to display system information. If x86_64 is displayed your system is a 64 bit otherwise it is a 32 bit. While the ISO file you download can be either 64 bit is generally better however it depends on your individual needs.
You can download Ubuntu from their website.
Step 2: Mount USB to computer
Plug the USB into the computer Check for a mount point for the USB inserted with ...
$ lsblk This will display all avaliable devices attached to the computer.
If you want to create a mount point do the following using
mount ... However this is not needed unless you want to save some files first since the next part will remove everything on the USB. $ mount /dev/"USB" /mnt - Replace /dev/"USB" whatever the USB is named on your system. Hint: You can check the name of your usb is by unplugging and doing a
lsblk and then plugging the usb back in and checking which usb was added by doing another lsblk. For more guidence and instructions on using
lsblk and mounting. You can now
cd to the /mnt directory to view files within the USB. If you want to copy files from the USB to elsewhere you can use cp. Step 3: Copy ISO File Using DD Command
The dd command copies a file in this case it would be the iso file to the USB ...
Warning: This will remove contents in the USB.
$ dd if=ubuntu-15.10-desktop-amd64.iso of=/dev/"USB" bs=512k Replace to fit your individual situations.
The ISO file goes in the if="YOUR ISO FILE" section. The location is the USB which goes in the of=/dev/"USB". Finally the bs= determines the amount of bytes being written at a given time.
You can
man the dd command for more information. You should be done and have a bootable live USB with Ubuntu or whatever ISO file you used. Step 4: Enter BIOS
Make sure your USB is sticked into your computer and reboot into your computer's BIOS mode.
Pressing F12 or F11 usually brings you to the BIOS mode otherwise you might need to do a google search. You will most likely need to be in UEFI mode and may have to have secure boot disabled if it doesn't work.
Select the USB and it should boot into the live operating system.
For Windows:
Step 1: Download ISO
The ISO can be either 64 bit or 32 bit. Normally it should match the current bit you own. A quick way to check which bit your computer has is by doing the following ...
$ uname -a Note:
uname is used to display system information. If x86_64 is displayed your system is a 64 bit otherwise it is a 32 bit. While the ISO file you download can be either 64 bit is generally better however it depends on your individual needs.
You can download Ubuntu from their website.
Step 2: Download Rufus
Rufus is a program that allows for bootable USBs. There are other programs that can be used besides this but I find Rufus to be easier and faster.
Download Rufus from the Website.
Step 3: Select USB and ISO on Rufus
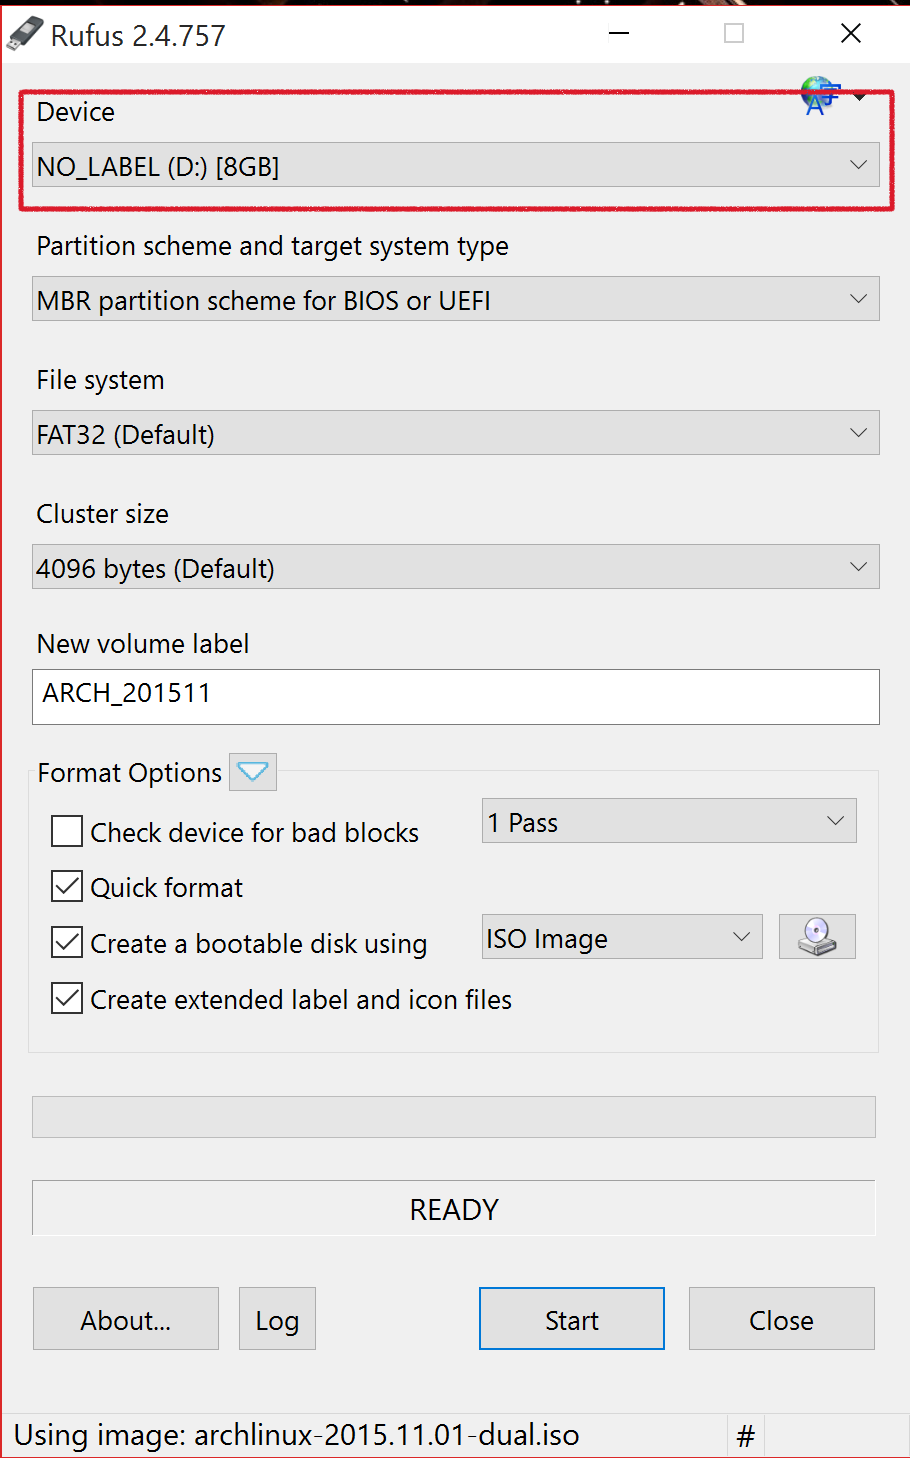
For the device section select your USB. Warning: Before preceding any further this process will remove everything in the USB.
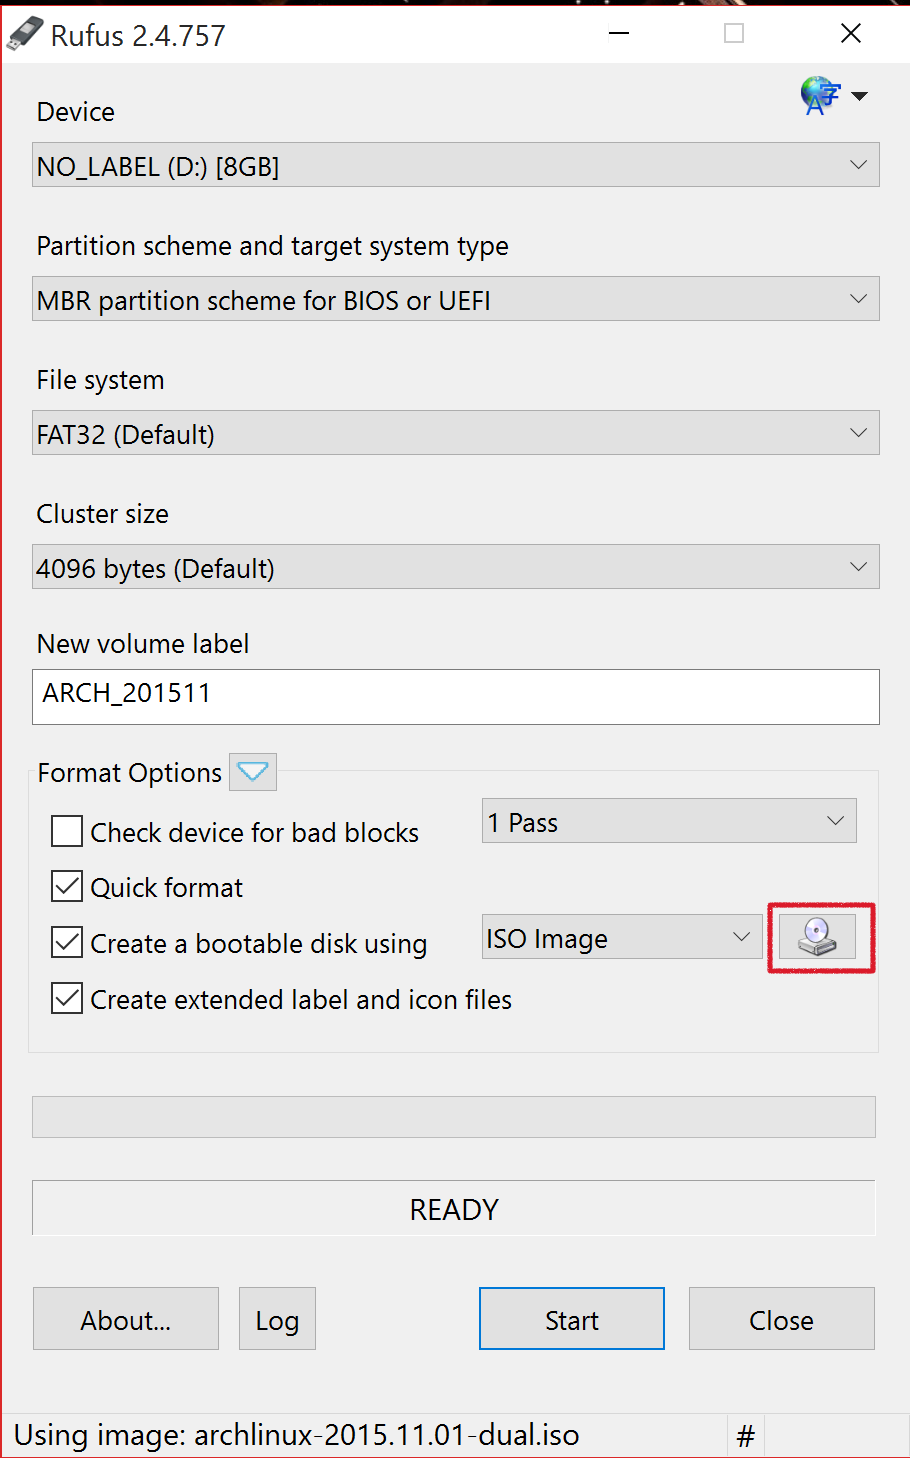
Click on the CD image and select your ISO file. Leave the rest of the fields the same and press start. The process takes a while but after its done you should now have a bootable live USB.
Step 4: Enter BIOS
Make sure your USB is sticked into your computer and reboot into your computer's BIOS mode. Pressing F12 or F11 usually brings you to the BIOS mode otherwise you might need to do a google search. You will most likely need to be in UEFI mode and may have to have secure boot disabled if it doesn't work.
Select the USB and it should boot into the live operating system.
Links: Rufus, Ubuntu